PLEASE NOTE: ACTION REQUIRED
A required XCharge update must be installed on any computer used to process payments in order to maintain alignment with security best practices and mandates.
It is important you install this update as soon as possible but no later than March 31, 2018 to avoid payment processing interruption.
After reviewing the Installation Steps, or in the event you may have any additional questions or concerns regarding XCharge or our other integrated payments services, please feel free to contact our dedicated TLS 1.2 Customer Care Team at (855) 443-3029.
System Requirements
Windows Users- Windows 7 and above.
- Microsoft .NET Framework 4.5 or higher.
- If you are using a Microsoft Remote Desktop Services or Terminal services environment Click Here.
- If you are using Windows Server 2008, Server 2008 SP2 (Non R2) Click Here
Additional Requirements
- Please allow for at least 30 minutes of time to complete the update.
- Please install the update to your XCharge server before installing to your XCharge clients.
- Your computer must be restarted after installation.
- Once the installation has started, please do not interrupt, pause or stop the installation as it may result in inability to process payments.
- You must be logged in using a Windows user with administrative rights.
How do I install the XCharge update?
If your XCharge Icon, or software states “Open Integration” Click Here
Installation Steps
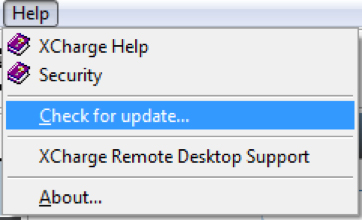
- Open the XCharge application.
- Click “Help” at the top of the XCharge Window.
- Click “Check for Update…”.
- XCharge will display a prompt asking to continue checking for updates.
- Click “Yes”.
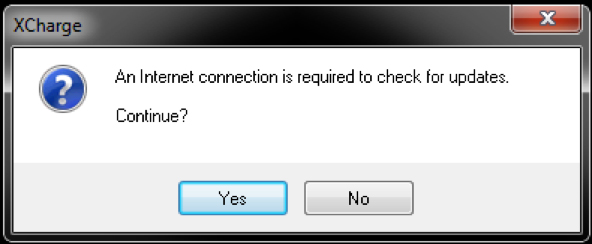
- XCharge will now check for updates.
- If a new update is available the following screen will display.
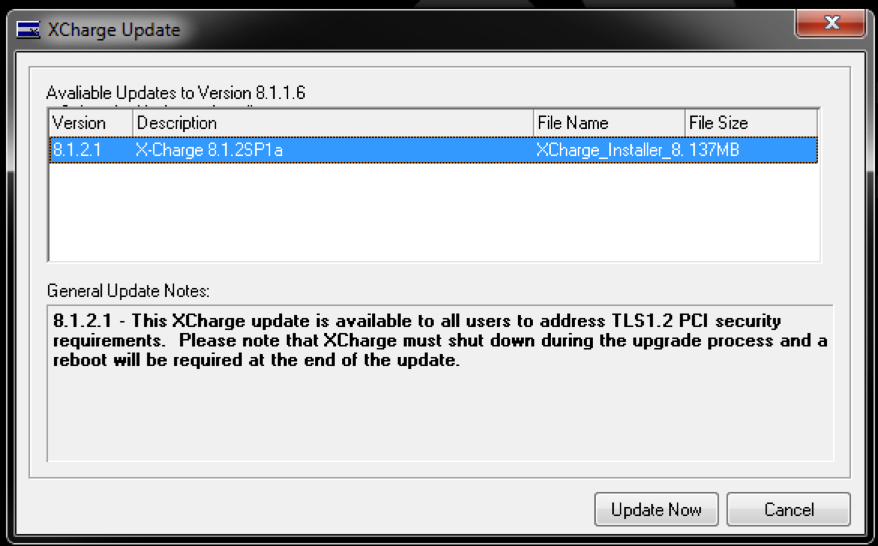
- If a new update is available the following screen will display.
- Click “Update Now” to proceed with updating XCharge.
- XCharge will now download the update.
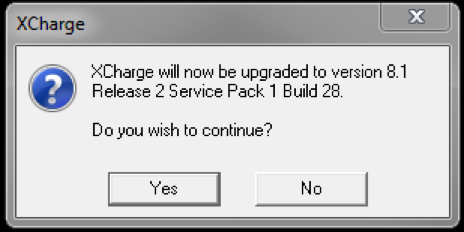
- Once the download has completed, you will be prompted to upgrade XCharge.
- Click “Yes” to continue.
- XCharge will now perform the software update.
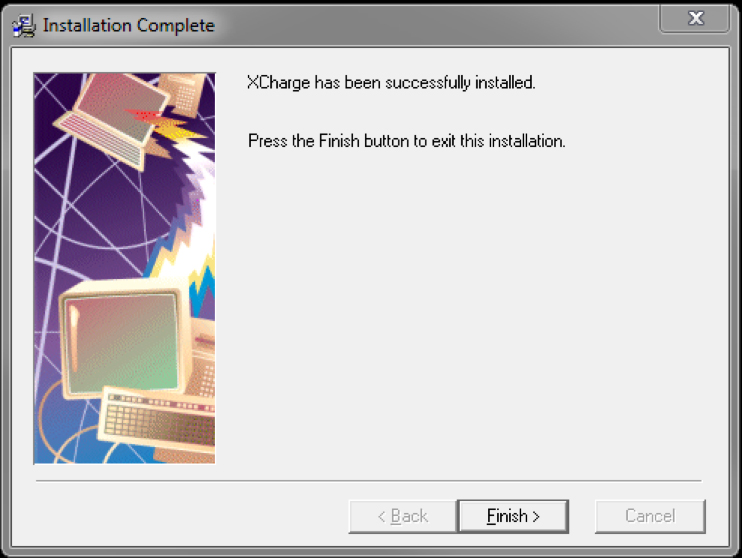
- Once completed, the “Installation Complete” window will display.
- Click “Finish” to complete the upgrade.
- Once the installation has completed, you will be prompted to restart the computer.

- Click “OK” to restart your computer.
How do I verify the XCharge update was successful?
- Once the update has completed, open the XCharge application.
- Click “Help” at the top of the XCharge Window.
- Click “Check for Update…”.
- If the update was successful, you will see a notification that “no new updates are available”.
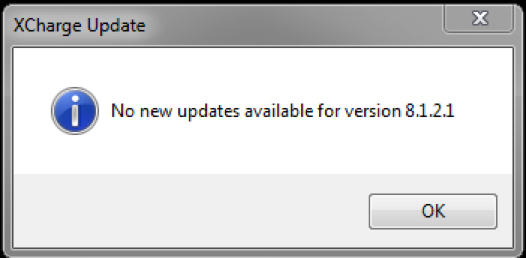
- Once you receive this message, you’re all set! Thank you for updating XCharge!
If you are experiencing lengthy download timeframes using Check for Updates, please verify your type of XCharge installation and download the necessary software from the links below.

For most installations, please download XCharge, here
Please note, if your XCharge Icon, or software states “Open Integration”
Download the correct installer here.
OpenEdge cannot be held liable for interruptions caused by your failure to comply with the requirements described in this notice.